Bambu Lab Maker s Supply Wireless Charger Kit #REF
- Brand: Bambu Lab
- MPN: K012
- Part #: PTABAM1004
- UPC:
View all shipping info


- Brand: Bambu Lab
- MPN: K012
- Part #: PTABAM1004
- UPC:
Features
Overview
The Wireless Charger Kit contains all the non-3D printed parts for assembling an entirely functional A1 mini Wireless Charger or an Air Force Command Headquarters Wireless Charger. To complete the work, you need to download the model files and 3D print the parts.
To download the model files and obtained detailed information, please visit A1 mini Wireless Charger or Air Force Command Headquarterson Makerworld.
Documentation

Model Links
A1 mini Wireless Charger
Air Force Command Headquarters
A1 mini Wireless Charger
A1 mini Wireless Charger is here! We have designed an adorable wireless charger model based on the appearance of our A1 mini 3D Printer.


- Simply connect a Type-C cable to the wireless charger to power it on. Then place your phone on the wireless charging plate to start the charging process.
- Once the charging starts, the Z-axis will simulate the printing process by moving up and down for one cycle. During this time, the LOGO light and indicator light will light up.
- You can use the Make My Sign function on Makerworld to customize your own nameplate for your A1 mini wireless charger. To learn more about the nameplate customization, please visit A1 mini Wireless Charger on Makerworld.

- To accommodate different phones and filaments, we have specially designed two power modes (high/low) to avoid phone overheating and heat deflection of printed parts.
- We have also engineered two different drive modes (mode 1 and mode 2) for the A1 mini wireless charger to adapt to varying levels of friction generated during the Z-axis movement. (This friction is caused by differences in filament materials and printing tolerances)
Drive Mode Specifications
- The A1 mini Wireless Charger is only compatible with Mode 1, 2, 7. Please do not keep it in Mode 3, 4, 5, 6 for an extended period. This precaution is necessary to prevent any potential damage to the model.
- All drive modes are arranged in a fixed cyclic order (1 to 7). Each press of the drive mode switch will switch the wireless charger to the next mode in sequence.


Recommended Filaments

Installation
Recommended tools for installation: PH Screwdriver, Transparent Adhesive, Wire Cutter, Needle Nose Side-Cutter, Tweezer, Glue.


Specifications
Reviews
Delivery & Pick-up
 .
.
Shipping Costs
Shipping costs vary based on your location and the items being shipped and in some cases shipping may even be FREE.
To calculate what the shipping costs will be for your order, add the items you are interested in to your cart, view the Shopping Cart page, and select your 'Delivery Area' to calculate the shipping cost.
Shipping Security and Insurance
All orders shipped by PB Tech are sent via a courier with a signature required for each delivery. In some cases, and only where you have given the courier company permission to leave orders at a designated location, your order may be delivered without requiring a signature. All orders sent by PB Tech are fully insured in the unlikely event that your item(s) are damaged or go missing in transit.
Delivery Estimates
The delivery time-frame (in days) for each product we sell is detailed on the individual product page just to the right of the main product image. From when you place your order, for DHL express delivery in-stock products typically arrive within 2-3 working days for metro areas and 3-5 working days for rural areas. For Standard delivery in-stock products typically arrive within 3-7 working days for NSW, VIC, ACT, QLD and SA deliveries and 5-10 working days for WA, TAS and NT.
Overseas Shipments
If you are located in New Zealand, you can order directly from our New Zealand site www.pbtech.co.nz. If you are from another country you can order from www.pbtech.com
Returns & Warranty
Popular 3D Printer Parts & Accessories

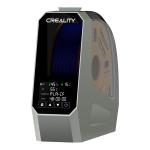 Creality Accessories Filament Dryer Space Pi for FDM

 Creality Spare Parts Ceramic Heating Head Kit for Ender-3 V3 KE

 Creality Accessories Space Pi Filament Dryer Plus for FDM 3D...

 Bambu Lab Accessories Hotend with Stainless Steel Nozzle - 0.2mm...

 Creality Accessories SpacePi X4 Filament Dryer - 4x Spools Up to...


Bambu Lab Maker s Supply Wireless Charger Kit #REF
- Brand: Bambu Lab
- MPN: K012
- Part #: PTABAM1004
Product URL: https://www.pbtech.com/au/product/PTABAM1004/Bambu-Lab-Maker-s-Supply-Wireless-Charger-Kit-REF
Features
Overview
The Wireless Charger Kit contains all the non-3D printed parts for assembling an entirely functional A1 mini Wireless Charger or an Air Force Command Headquarters Wireless Charger. To complete the work, you need to download the model files and 3D print the parts.
To download the model files and obtained detailed information, please visit A1 mini Wireless Charger or Air Force Command Headquarterson Makerworld.
Documentation
Model Links
A1 mini Wireless Charger
Air Force Command Headquarters
A1 mini Wireless Charger
A1 mini Wireless Charger is here! We have designed an adorable wireless charger model based on the appearance of our A1 mini 3D Printer.
- Simply connect a Type-C cable to the wireless charger to power it on. Then place your phone on the wireless charging plate to start the charging process.
- Once the charging starts, the Z-axis will simulate the printing process by moving up and down for one cycle. During this time, the LOGO light and indicator light will light up.
- You can use the Make My Sign function on Makerworld to customize your own nameplate for your A1 mini wireless charger. To learn more about the nameplate customization, please visit A1 mini Wireless Charger on Makerworld.
- To accommodate different phones and filaments, we have specially designed two power modes (high/low) to avoid phone overheating and heat deflection of printed parts.
- We have also engineered two different drive modes (mode 1 and mode 2) for the A1 mini wireless charger to adapt to varying levels of friction generated during the Z-axis movement. (This friction is caused by differences in filament materials and printing tolerances)
Drive Mode Specifications
- The A1 mini Wireless Charger is only compatible with Mode 1, 2, 7. Please do not keep it in Mode 3, 4, 5, 6 for an extended period. This precaution is necessary to prevent any potential damage to the model.
- All drive modes are arranged in a fixed cyclic order (1 to 7). Each press of the drive mode switch will switch the wireless charger to the next mode in sequence.
Recommended Filaments
Installation
Recommended tools for installation: PH Screwdriver, Transparent Adhesive, Wire Cutter, Needle Nose Side-Cutter, Tweezer, Glue.


